To true a bicycle wheel, you’ll need to play with the tension of the spokes by fastening the nipples. Once adjusted, the spoke will correct the deviation of the rim, allowing you to ride your bike like nothing ever happened.
I have been riding bikes for more than a decade, during which I've bent countless numbers of wheels and had to true them by myself to save the cost of going to a mechanic each time.
In this article, we will go over the different techniques to true a bike and answer the most common question about the art that is wheel truing.
Table of Contents
Before starting to work on your bent wheel, you need to do three things :
Although not mandatory, this second step is essential for beginners. You’ll have a much easier time spotting the rim deviations without the tire on.

Once the hub is fixed on the truing stand, place the indicators on each side of the rim—at approximately 1 inch. You don’t want them to make contact but they must be close enough so that you can barely fit a finger.
To do this, slowly spin the handle until you hear contact between the rim and the indicators as the wheel spins. Make sure to stop turning the handle as soon as the rim and indicators are slightly touching one another.
If the wheel stopped, you've gone too far. Loosen the indicators and spin the wheel again.
Once you’ve identified the area of the rim that has the more severe deviations, you need to find the center of this area to know which spokes to tighten.
To make sure that you’ve located the right spot, grab the closest two spokes from the center and squeeze them together. If the rim drifts away from the indicator, that means you’re working on the correct area.
Remember, you need to turn the spoke wrench in a clockwise motion to tighten the spoke nipple and counterclockwise to loosen it.
Keep the motion slow and observe how the rim reacts while tightening the spokes. If you tighten it too much, you risk damaging the spoke’s integrity.
If you hear a squeaky sound, you've either forgot the oil or have turned the nipple threads too much. In doubt, loosen the spokes.
A good rule of thumb to follow: after each quarter of a turn of each nipple, spin the wheel back and compare its effect on the deviation with the indicator fingers.
To keep the equilibrium of the wheel intact, you’ll want to tighten the spokes on both sides of the rim, making sure the opposite. Once the right side spokes of the rim are evenly tensioned, switch sides and focus on the left side spokes.

If you’ve ridden your bike long enough, there is a high chance that your wheels have suffered important stresses. This means that it’s probably impossible to have them "perfectly true".
As a reference, professionals usually consider 0.5mm deviation to be the perfect moment to stop tightening the spokes.
In practice, you’ll hardly ever notice the difference. A rim with a 1mm lateral deviation won’t impact your performance on the bike nor the lifespan of the wheels themselves.
After a lateral true, it is advised to ride your bike to de-stress the spokes. After a couple of minutes, check spoke tension to make sure it didn't vary too much.
Of course, you can true your bicycle wheels by yourself. However, be aware that truing a wheel takes some patience. You’ll also need to have the correct set of tools as well as the adequate technique—which is explained below.
While truing a wheel isn’t hard per se, it’s an easy process to mess up and you can end up pretty quickly worsening the damages. However, if you’re willing to take the time and follow the steps with great care, there’s no reason why you shouldn’t be able to master the art.
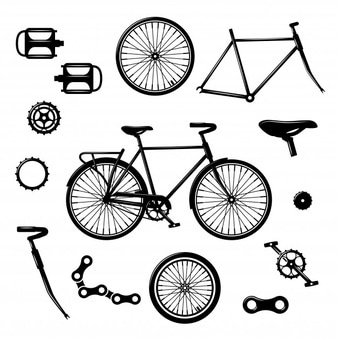
To learn how to true wheels without risking weakening it, it is essential to have a good grasp of the components of a bicycle wheel and the role that they play:
The tire is the part of the wheel that enters into direct contact with the asphalt. Usually made in either natural or synthetic rubber, the tire protects the inner tube and connects to the rim. Note that some tires are tubeless which limits their risk of going flat.
The inner tube, or simply tube, is a circular valve that surrounds the rim of the wheel and fits within the casing of the tire. Its pneumatic property allows the wheel to match the asperity of the ground without damaging the rim, spokes, and hub.
The rim is the circular part of the wheel where the tire and the spokes meet. Generally made of aluminum alloy or stainless steel, it’s the part of the wheel that’s the most prone to shocks due to impact or collision with rocks.
The spokes are the thin rigid cables fixed between the rim and the hub of a wheel. They can be made out of aluminum, stainless steel, carbon fiber, or even titanium. They form an important piece of the wheel allowing it to spin consistently without weighing it down.
The hub is the central point of the wheel where all the spokes converge and where the axle connects with the fork. Commonly made of a mix of steel, aluminum, and carbon, the standard bicycle hub contains a set of two bearings to smoothen the rotation of the wheel.
Also known as the brake system or rim brakes, the brake pads aren't parts of the wheel, as they’re attached to the fork, but they interact directly with the rim and can cause some wheel troubles after a fall or a torsion. There are different types of pads on the market such as calipers, cantilevers, or v-brakes.

Now that you understand the overall composition of a bike wheel, it’s time to jump into the science of truing wheels.
Simply put, wheel truing is the process of correcting the deviation of an out wheel on its axis. This asymmetry is caused by loose spokes, which can occur after a shock or can simply happen after an extended use over a long period.
The most common way to know for sure that your wheel isn’t straight in its axis is to check out your brake pads.
Do they rub against the rim? If so, chances are your wheel is in dire need of truing.
The same goes for the tires. If one or both tires rub against the frame, there’s a problem of inadequate lateral alignment.
You should also check the state of your wheel after any rough landing (one wheel before the other, or simply a poor form after landing a jump), crash, or shock.
Finally, a good indicator that it’s time to have your wheel fixed is when you notice missing or broken spokes. While it’s not dangerous to continue riding a bike with uneven spoke tension, in the long run, you might do some harm to the structure of the rim and hub. This will eventually wear the tire down faster than normal.
The spoke wrench is the keystone of any good wheel truing. Also known as "spoke key", the spoke wrench interacts directly with the spokes and more precisely with the spokes nipples, which are used to adjust the spoke tension, or replace them when needed.
You’ll find them in most bike shops for around $10 to $15.
If you don’t have a spoke key, you can use a screwdriver as an alternative. Just make sure to be gentle while you unscrew the spoke nipples so you don’t tear them down.
A truing stand is the most convenient tool to work on an out-of-true wheel. It helps identify the root of the problem by allowing the wheel to spin freely while letting enough space to maneuver around it and fix the wobbly wheel.
Truing stands are equipped with built-in indicators placed from both sides of the wheel to help pinpoint the possible deviations of the rim.
While a truing stand is the best medium to work on a wheel, it isn’t mandatory to have. As a replacement, you can simply turn your bike upside down and use the frame as a repair stand to keep the wheel stuck in place. Then you can use the brake pads as indicators or attach a card or a zip tie on the fork.
To have an easier time truing a wheel, it’s recommended to remove the tire prior to working on the spokes. To do this easily, there’s nothing better than a tire lever to hook the inside of the tire and free the rim.
This one is quite irreplaceable. Using any other substitutes (such as a screwdriver or a knife handle) will likely result in damage to the inner tube and the tire itself.
There is one way of removing it using only your hands. Once the tube is flattened, pull the beads in the center of the rim until the tire comes loose and then push the tire out of the rim with the inner tube. Be aware that this technique works better on thin road or cruiser bikes wheels. I wouldn’t advise it for MTB or BMX.

There are 2 main ways you can true a bicycle wheel depend on the deviation it has:
A lateral deviation is the most common type of correction a wheel needs. It occurs naturally by simply trail riding on your bike. With time, the spokes lose tension which bends the lateral spinning axis of the wheel.
You’ll notice it if your wheel rubs against the rim brake or worse, against the frame of the bike.
A radial deviation is pretty common for bikes subject to frequent impacts such as MTB or BMX. It’s recognizable by having bumps on the rim going towards the center of the wheel.
You’ll notice this instantly as it changes the circular form of the rim, and can quickly become unbearable to ride on.
Besides slowing you down, brake pads rubbing against the rim lead to faster wear of both parts.
As we’ve seen in the previous section, a slightly bent rim can cause the wheel to rub against the brake pad. You can fix it by truing the wheel as detailed in the step-by-step guide right above.
However, a brake rub can also occur after an incorrect adjustment of the braking system. To rectify this, play with the nuts of the lever until the piston of the brakes drifts away from the rim.
Make sure both calipers are perfectly centered—aligned with the frame—meaning they will meet the rim at the same moment and won’t require too much force to pull.
I hope this article helped you resolve the pain that is a misaligned wheel. Keep in mind that, for the most severe bend, you may need to buy new spokes, a new rim, or even a new wheel altogether.
If you're unsure about the solidity of your final setup, head to the nearest bike shop to have it checked by an expert. It can prevent you from having to true your wheel again or worse, completely blowing it and having to invest in a new one.
